
How to Make Mary Berry’s Classic Dorset Apple Cake
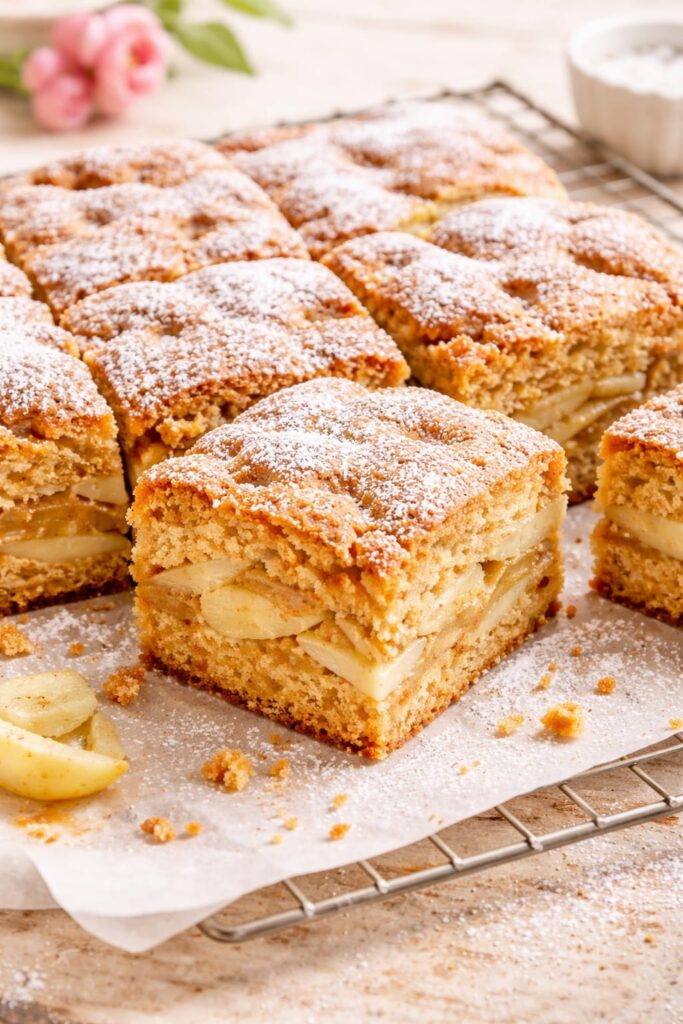
Mary Berry's Dorset Apple Cake is a quintessential British traybake featuring tender Bramley apples, warming cinnamon, and rich muscovado sugar. Popular for its moist, spiced sponge and sweet, fruity pockets, this comforting dessert is incredibly easy to make and perfect for autumn afternoon teas or cozy family puddings.
How do you make Mary Berry's Dorset Apple Cake?
To make this classic cake, beat together 225g softened butter, 225g light muscovado sugar, 300g self-raising flour, 4 large eggs, 2 teaspoons of baking powder, 1/2 teaspoon of cinnamon, and 1 tablespoon of milk. Spread half the batter in a lined 30x23cm tin. Layer with 550g of thinly sliced Bramley apples tossed in lemon juice, sprinkle with another 1/2 teaspoon of cinnamon, and top with the remaining batter and apples. Bake at 180°C (160°C Fan) for 40 minutes.
Why is this the ultimate traditional British bake?
There is nothing quite like the comforting aroma of a spiced fruit sponge baking in the oven. When it comes to reliable, crowd-pleasing desserts, Mary Berry’s recipe for this traditional countryside treat stands out as a genuine classic.
Originally created as a delicious way to use up an autumn windfall of garden apples, the Dorset apple cake has evolved into a beloved national favorite. By utilizing a traybake format, the cake bakes evenly and yields generous, uniform portions ideal for sharing. The inclusion of light muscovado sugar brings a deep, caramel-like richness that pairs beautifully with the sharp acidity of cooking apples.
Recipe Characteristics
| Feature | Detail |
| Preparation Time | 15 - 20 minutes |
| Cooking Time | 40 minutes |
| Total Time | 1 hour |
| Yield | 12 servings |
| Calories | 341 kcal per serving |
| Skill Level | Beginner |
What ingredients do I need?
Success in baking relies on exact measurements and the right choice of produce. Gather the following ingredients before you begin.
The Cake Batter:
- 225g (8oz) unsalted butter, softened at room temperature (plus extra for greasing)
- 225g (8oz) light muscovado sugar
- 300g (10oz) self-raising flour
- 2 tsp baking powder
- 1 tsp ground cinnamon (divided into two 1/2 tsp portions)
- 4 large eggs, room temperature
- 1 tbsp full-fat or semi-skimmed milk
The Apple Filling:
- 550g (1 ¼ lb) cooking apples (Bramley apples are highly recommended)
- Juice of ½ a lemon
- Icing sugar, to dust the finished cake
How do I prepare and bake the cake?
Following a structured, step-by-step approach ensures your sponge remains light and your fruit cooks perfectly.
Step 1: Prepare your equipment and fruit
- Preheat your standard oven to 180ºC (160ºC Fan / 350ºF / Gas Mark 4).
- Lightly grease a 30 x 23cm (12 x 9 inch) traybake tin that is at least 4cm deep. Line the base and sides with non-stick baking parchment.
- Quarter, peel, and core the Bramley apples. Slice them very thinly.
- Place the sliced apples into a shallow dish, pour over the fresh lemon juice, and toss gently. This prevents oxidation and adds a bright flavor note.
Step 2: Mix the cake batter
- In a large mixing bowl, combine the softened butter, light muscovado sugar, self-raising flour, baking powder, ½ teaspoon of the ground cinnamon, the eggs, and the milk.
- Using an electric hand whisk, beat the ingredients thoroughly for about 2 minutes until the batter is completely smooth, pale, and light. If using a wooden spoon, beat vigorously for about 3 minutes.
Step 3: Assemble the layers
- Spoon exactly half of the cake mixture into your prepared tin. Use a palette knife or the back of a spoon to spread it out into an even layer.
- Lay half of the lemon-tossed apple slices over the batter.
- Sprinkle the remaining ½ teaspoon of cinnamon evenly over this fruit layer.
- Carefully dollop the remaining cake mixture on top of the apples in small blobs, then gently level the surface with your palette knife.
- Scatter the rest of the apple slices over the top of the cake mixture in a random pattern. Press them lightly into the surface.
Step 4: Baking instructions for standard ovens
- Place the tin in the center of your preheated oven.
- Bake for 40 minutes. You will know it is ready when the cake is well risen, golden brown, and starting to shrink slightly away from the edges of the tin. The apples on top should be visibly soft.
- Leave the cake to cool in its tin for 10 minutes.
- Run a blunt knife around the edges, turn the cake out onto a wire cooling rack, peel away the parchment paper, and leave to cool completely. Dust generously with icing sugar before slicing.
Step 5: Baking instructions for AGA cookers
Baking in an AGA requires a slightly different approach to manage the intense, radiant heat.
- Place the grid shelf on the floor of your Roasting Oven and slide the cold plain shelf onto the second set of runners down.
- Bake the traybake for 15 to 20 minutes, watching carefully until it achieves a pale golden-brown color.
- Carefully transfer the plain shelf to the middle of the Simmering Oven.
- Move the cake tin onto this shelf and bake for a further 20 to 25 minutes, or until a skewer inserted into the center comes out clean and the fruit is completely tender.
How do I achieve defined layers and juicy apple pockets?
Professional bakers use a few specific techniques to elevate a simple sponge into a bakery-quality dessert.
Slice the apples wafer-thin
If you chop the apples into thick chunks, they will not soften enough during the 40-minute bake time. Slicing them thinly ensures they break down into soft, juicy pockets of fruit that melt into the surrounding sponge.
Preserve the layered effect
When adding the second half of the batter over your middle layer of apples, take extreme care. Dropping the batter in small spoonfuls across the surface, rather than pouring it all in the middle, makes it much easier to spread. Use a palette knife and use a light touch to avoid dragging the fruit slices underneath.
Embrace a rustic topping
You do not need to arrange the top layer of apples in perfect, concentric circles. Scattering them in random directions gives the final bake an appealing, rustic texture that captures pockets of icing sugar perfectly.
Can I make healthier, dairy-free, or vegan variations?
Customizing this recipe for different dietary requirements is surprisingly straightforward.
- Dairy-Free Option: Swap the 225g of butter for a high-quality, plant-based baking block of the exact same weight. Replace the tablespoon of cow's milk with oat, almond, or soy milk.
- Vegan Variation: Use the dairy-free substitutions above, and replace the 4 large eggs with a flax egg mixture (4 tablespoons of ground flaxseed mixed with 12 tablespoons of water, left to thicken for 10 minutes) or 240g of unsweetened applesauce. Add an extra half-teaspoon of baking powder to assist with the lift.
- Healthier Tweaks: You can replace up to half of the self-raising flour (150g) with wholemeal self-raising flour to increase the fiber content. The cake will be slightly denser but will gain a lovely nutty flavor.
- Flavor Additions: If you want to experiment, fold 50g of chopped walnuts or 75g of juicy sultanas into the batter before assembling. You can also swap the cinnamon for a traditional British mixed spice blend.
What are the best serving suggestions?
This versatile bake transitions effortlessly from a casual daytime snack to a decadent evening dessert.
If you are hosting a morning coffee morning or an afternoon tea, serve the cake completely cooled, cut into neat squares, and heavily dusted with icing sugar. The firm sponge holds up well on a napkin or saucer.
To serve it as a comforting dessert, warm individual slices in the microwave for 15 to 20 seconds. Place the warm cake in a shallow bowl and serve alongside a generous dollop of Cornish clotted cream, a scoop of premium vanilla bean ice cream, or a pitcher of hot vanilla custard.
How should I store and freeze my apple cake?
Fruit cakes retain moisture exceptionally well, making them ideal for making ahead of time.
- Room Temperature: Place the completely cooled slices in an airtight container lined with paper towels to absorb excess fruit moisture. Store in a cool, dry place for up to 3 days.
- Refrigerator: If your kitchen is particularly warm, keep the container in the fridge for up to 5 days. Always bring the slices back to room temperature before eating to ensure the best flavor and texture.
- Freezing: This cake freezes beautifully. Wrap individual squares tightly in a layer of plastic wrap, followed by a layer of aluminum foil. Freeze for a maximum of 3 months. Defrost fully at room temperature for a few hours before serving.
Ready to bake your own masterpiece?
Mastering Mary Berry's Dorset Apple Cake is a guaranteed way to bring a touch of classic British baking into your own kitchen. By paying close attention to your ingredient weights, slicing your apples thinly, and layering the batter with care, you will be rewarded with a deeply comforting, perfectly spiced dessert. Grab your mixing bowl, preheat your oven, and enjoy the process of creating a bake that family and friends will request time and time again.
- 225 g unsalted butter, softened at room temperature (plus extra for greasing)
- 225 g light muscovado sugar
- 300 g self-raising flour
- 2 tsp baking powder
- 1 tsp ground cinnamon (divided into two 1/2 tsp portions)
- 4 large eggs, room temperature
- 1 tbsp full-fat or semi-skimmed milk
- 550 g cooking apples (Bramley apples are highly recommended)
- Juice of ½ a lemon
- Icing sugar, to dust the finished cake
- 1 Step 1: Prepare your equipment and fruit
- Preheat your standard oven to 180ºC (160ºC Fan / 350ºF / Gas Mark 4).
- Lightly grease a 30 x 23cm (12 x 9 inch) traybake tin that is at least 4cm deep. Line the base and sides with non-stick baking parchment.
- Quarter, peel, and core the Bramley apples. Slice them very thinly.
- Place the sliced apples into a shallow dish, pour over the fresh lemon juice, and toss gently. This prevents oxidation and adds a bright flavor note.
- 2
Step 2: Mix the cake batter- In a large mixing bowl, combine the softened butter, light muscovado sugar, self-raising flour, baking powder, ½ teaspoon of the ground cinnamon, the eggs, and the milk.
- Using an electric hand whisk, beat the ingredients thoroughly for about 2 minutes until the batter is completely smooth, pale, and light. If using a wooden spoon, beat vigorously for about 3 minutes.
- 3
Step 3: Assemble the layers- Spoon exactly half of the cake mixture into your prepared tin. Use a palette knife or the back of a spoon to spread it out into an even layer.
- Lay half of the lemon-tossed apple slices over the batter.
- Sprinkle the remaining ½ teaspoon of cinnamon evenly over this fruit layer.
- Carefully dollop the remaining cake mixture on top of the apples in small blobs, then gently level the surface with your palette knife.
- Scatter the rest of the apple slices over the top of the cake mixture in a random pattern. Press them lightly into the surface.
- 4
Step 4: Baking instructions for standard ovens- Place the tin in the center of your preheated oven.
- Bake for 40 minutes. You will know it is ready when the cake is well risen, golden brown, and starting to shrink slightly away from the edges of the tin. The apples on top should be visibly soft.
- Leave the cake to cool in its tin for 10 minutes.
- Run a blunt knife around the edges, turn the cake out onto a wire cooling rack, peel away the parchment paper, and leave to cool completely. Dust generously with icing sugar before slicing.
- 5
Step 5: Baking instructions for AGA cookers- Place the grid shelf on the floor of your Roasting Oven and slide the cold plain shelf onto the second set of runners down.
- Bake the traybake for 15 to 20 minutes, watching carefully until it achieves a pale golden-brown color.
- Carefully transfer the plain shelf to the middle of the Simmering Oven.
- Move the cake tin onto this shelf and bake for a further 20 to 25 minutes, or until a skewer inserted into the center comes out clean and the fruit is completely tender.